Fix Uneven Antique Gel Absorption on Tooled Leather Coasters
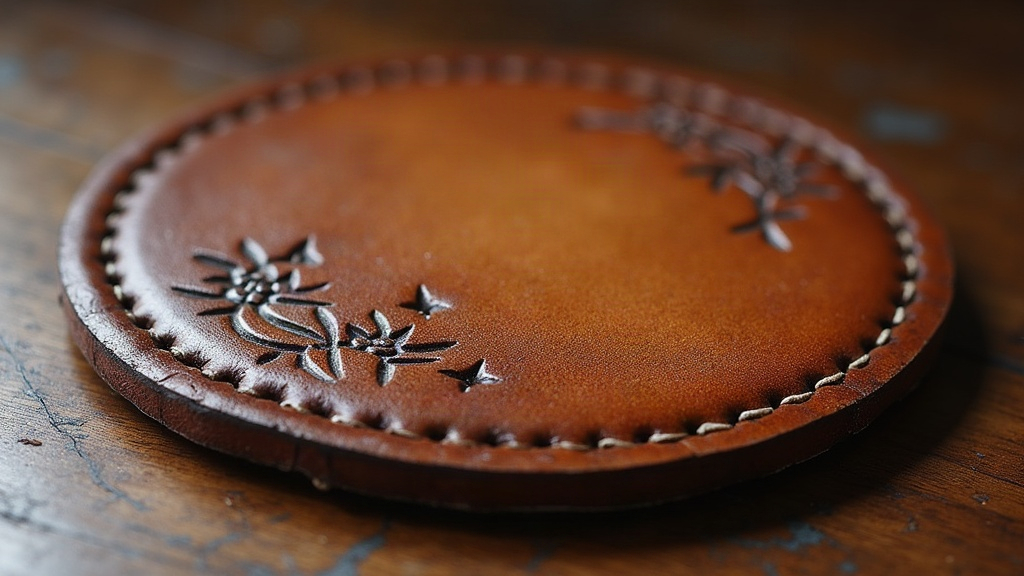
Why Your Tooled Leather Coasters Are Taking Antique Gel Unevenly
Splotchy antique gel on a tooled floral coaster almost never means the piece is ruined. Nine times out of ten it traces back to one of three things: the leather’s moisture wasn’t consistent going in, the tooling wasn’t compressed enough, or the application itself was rushed. Good news is, all three are fixable without tearing the project apart and starting over. Here’s the breakdown, cause by cause, fix by fix.
Why Antique Gel Absorbs Unevenly
Antique gel is supposed to settle into the low spots, the recessed background, the swivel-knife cuts of your floral pattern, and then wipe cleanly off the raised, burnished surface. When instead you’re staring at a coaster that’s dark in some patches and almost bare in others, it’s usually one of these:
- Inconsistent case-hardening. If the leather wasn’t cased (dampened) evenly before you started tooling, you end up with patches of different fiber density, and those patches soak up gel at different rates.
- Incomplete burnishing of raised areas. A high point that’s flat or only half-burnished behaves like a sponge instead of pushing the gel away.
- Leather that’s too dry before gel goes on. Bone-dry veg-tan grabs gel fast and unevenly. It needs a proper conditioning pass first.
- Gel applied too thick, or left sitting too long before you wipe. That’s what causes pooling in shallow stamped sections compared to deeper cuts.
- Gel that’s old or separated. Water-based antique gels separate on the shelf. Skip the stirring and you’re basically applying a different pigment-to-binder ratio with every swipe.
Step-by-Step Fix
1. Clean the Surface First
Wipe the coaster down with a slightly damp cloth. Get rid of dust, oils from handling, any dried gel residue sitting on top. Let it dry all the way before you touch it again, rushing this step just reintroduces moisture inconsistency later.
2. Re-Condition Lightly
Put on a thin, even coat of leather conditioner, or a light sheen/finish prep if that’s what you normally use. This re-equalizes moisture across the hide so the next gel pass absorbs the same everywhere. One light, even coat is plenty, soaking it will just create a new problem.
3. Re-Burnish High Points
Grab a wood or bone slicker (a spoon back works fine on small coasters too) and go back over every petal, leaf vein, and background texture. Burnishing compresses the fibers so gel literally has nothing to grip. This one step clears up most “dark smudge sitting on a raised area” complaints on its own.
4. Stir, Don’t Shake, the Gel
Pigment settles to the bottom of the jar over time. Stir from the bottom with a craft stick until it’s fully blended, no streaky clear gel, no clumps of pigment hiding at the base.
5. Apply in Thin, Even Layers
A wool dauber or soft brush, small overlapping circles, working the gel into every recess. Don’t flood one section then move on, that’s exactly how you get uneven dwell time. Work the whole coaster in one continuous pass instead.
6. Wipe at a Consistent Interval
Time it, usually 30 to 60 seconds depending on the brand, and wipe the whole piece off at once rather than section by section. A clean, dry cotton cloth, even pressure, start to finish.
7. Spot-Correct Light Areas
Still see a recess that looks too pale after the first pass? Hit just that spot with a small detail brush, let it sit the same dwell time as everything else, then wipe. No need to redo the whole coaster.
8. Seal Evenly
Finish with a top coat, acrylic resolene or whatever sealer you normally reach for, applied in thin, even strokes. This locks the antique finish in and keeps it from rubbing off on someone’s coffee mug six months from now.
Preventing This on Future Coasters
- Case your leather the same way every time: same water temperature, same rest period, no shortcuts on a “quick” batch.
- Burnish every single raised tooling detail before gel or dye ever touches the piece.
- Test the gel on a scrap from the same hide first, just to check dwell time and how deep the color actually sits.
- Stir the gel before every session, not just the first time you crack the lid open.
- Batch similarly-sized pieces together so your timing stays consistent coaster to coaster.
Conclusion
Blotchy antique gel on a tooled floral coaster is a technique problem, not a tossed-project problem. Re-condition the leather, go back over the burnishing, stir your gel properly, and lay it down in one even, timed pass. Do that and you’ll get the crisp contrast between background and raised pattern that makes a coaster look deliberately hand-finished, not accidentally stained.