Advanced Inlay Techniques for a Brass Compass Rose in Leather
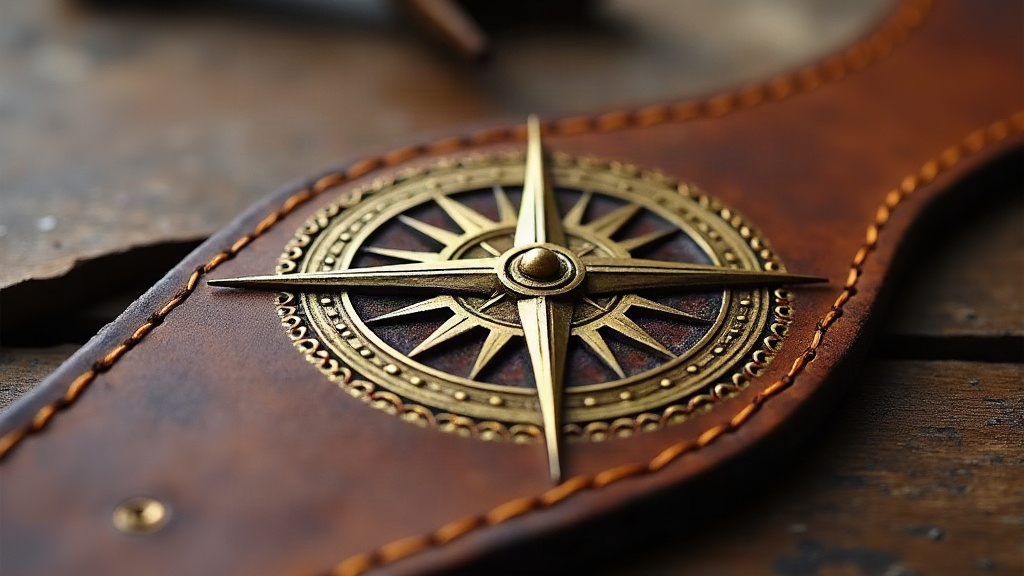
Embedding a Brass Compass Rose in Leather: A Practical Inlay Guide
Embedding a thin brass compass rose into leather sits near the top of the difficulty ladder in leathercraft inlay work. You’re carving precise cavities, managing adhesion under real-world stress, and chasing a finish that keeps the metal flush for years, not just for the first six months. Get it right, though, and you end up with a focal point for journals, wallets, bags, or belts that looks like it rolled off a factory line but actually carries every fingerprint of handwork.
Why Brass Inlay Is Different From Standard Leather Tooling
Tooled or stamped designs stay within one material. Brass inlay doesn’t. You’re pairing a rigid, unyielding metal with leather, a material that breathes, swells, shrinks, and softens with age. That mismatch creates three specific headaches:
- Differential movement - leather expands and contracts with humidity (sometimes visibly, if you live somewhere with real seasons); brass just sits there, indifferent.
- Edge capture - the metal needs to be locked in mechanically and adhesively, not slapped on top and hoped for the best.
- Thickness matching - most compass rose blanks run 0.3-0.6mm, and that sliver of metal has to sit dead flush with the leather surface, not a hair proud, not sunken.
Choosing Your Brass Compass Rose Blank
Photo-etched or laser-cut brass blanks, in the 0.3mm to 0.5mm range, are your best bet for inlay work. The edges come out clean, the detail holds up, and the thickness stays manageable. Stamped blanks over 0.8mm are a different story: unless you’re working 8-10oz veg-tan, that extra thickness will telegraph through thinner hide, meaning the shape ghosts through on the back side where you don’t want it.
Tip: Order your blanks 2-3mm oversized. That margin lets you trim the brass to match your carved cavity instead of fighting to carve a cavity that matches a fixed shape exactly. Much easier to shave metal than to patch leather.
Step-by-Step Inlay Process
1. Case and Transfer the Design
Case your veg-tan leather (dampen it to a workable moisture level, not soaking) and transfer the compass rose outline with a swivel knife or a stylus over carbon transfer paper. This step sets the ceiling for how clean your recess ends up. Sloppy transfer now means fighting the shape later.
2. Carve the Recess Cavity
With a swivel knife for the outline and a small veiner or modeling spoon for clearing, remove leather down to roughly 70-80% of the brass thickness. This is the part where patience actually pays off:
- Too shallow, and the brass sits proud, catching on fabric, fingernails, whatever brushes past it.
- Too deep, and the inlay sinks, which traps dirt and moisture right at the edges where you least want it.
Work in thin passes. Test-fit the brass piece every few cuts rather than guessing and hoping you landed it right.
3. Bevel the Cavity Walls
Skip the straight vertical wall. Cut a slight inward bevel instead, somewhere around 5-10 degrees, so the cavity is narrower at the surface than down at the base. This creates a mechanical “dovetail” lock: once the brass is seated and the leather dries, the top edge of leather slightly overlaps the metal, holding it physically in place even if the adhesive someday gives up.
4. Adhesive Bonding
Reach for a flexible contact cement or a two-part epoxy rated for metal-to-leather bonding. Steer clear of rigid super glues; they’re brittle and will crack the moment the leather flexes. Apply a thin, even coat to both surfaces:
- Let the adhesive go tacky, following whatever the product instructions say.
- Seat the brass piece with tweezers, pressing from the center outward so air doesn’t get trapped underneath.
- Burnish the surrounding leather edge down over the bevel with a bone folder.
5. Cure Under Pressure
Clamp the piece between two flat boards, with a thin cork or felt buffer in between, and leave it for 12 to 24 hours. Even, sustained pressure is what keeps the edges from lifting while the adhesive sets.
6. Seal and Finish
Once the cure is complete, brush a light coat of leather finish (acrylic resolene or something similar) across the whole panel, brass included. This single step does three jobs at once:
- Protects the brass from tarnishing
- Seals the leather-to-metal seam against moisture
- Pulls the sheen of both materials into one unified look
Want an aged, antique feel? Apply an antique gel before sealing and let it pool into the recessed detail lines of the compass rose. The contrast it creates in those grooves is what sells the “old brass” look.
Common Mistakes to Avoid
- Skipping the bevel cut. A straight-wall cavity leans entirely on the adhesive, and sooner or later, often within a year of regular use, it pops loose.
- Over-wetting the leather. Too much moisture while carving softens the cell structure right around the cavity edge, which is exactly where you need it strongest.
- Ignoring humidity cycles. Let the finished piece sit and acclimate for 48 hours before putting it into regular use. That window tells you whether the bond actually holds under normal flexing, not just under clamp pressure.
Final Thoughts
A brass compass rose inlay pays back whatever patience you put into it. The bevel-cut cavity, correct brass thickness, and a flexible adhesive form the three legs this whole technique stands on; skip one and you’re looking at an inlay that lifts within months instead of lasting for decades. Nail this process once and you’ve essentially unlocked a repeatable method for any thin metal inlay, monograms, hardware emblems, whatever comes next in your leathercraft work.