Building a Hand-Stitched Leather Camera Strap with Brass Rivets
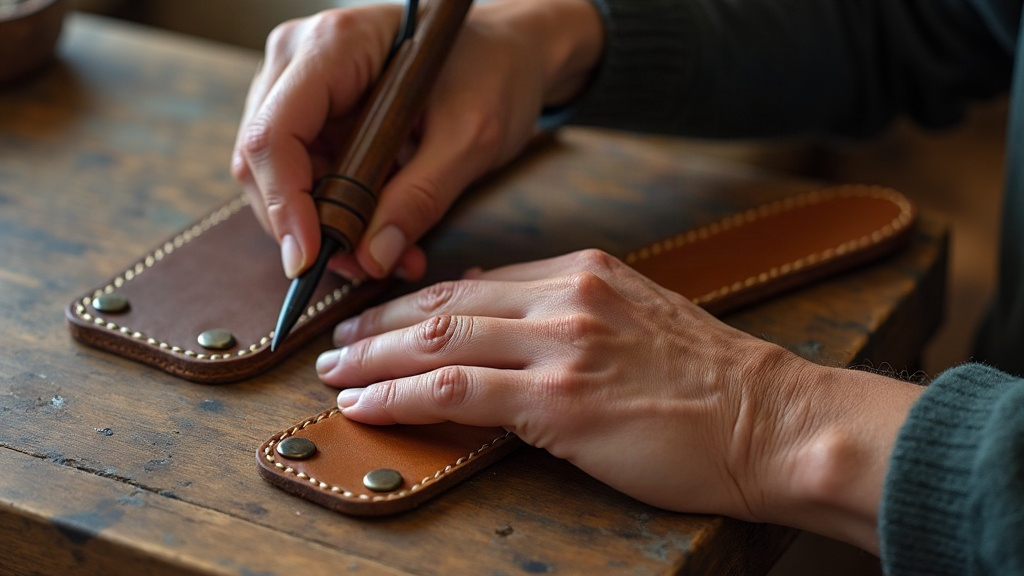
Picture your favorite heavy DSLR or that sleek mirrorless setup you just bought. Hanging it from a flimsy, mass-produced nylon strap feels like a total disservice to your gear. A hand-stitched leather camera strap secured with solid brass rivets changes the entire carrying experience. It brings together old-world craftsmanship and serious, everyday durability. Photographers get a strap that actually ages beautifully instead of fraying into a fuzzy mess. You can build one yourself. This guide walks you through picking the right hide, gathering the tools, mastering the saddle stitch, and setting rivets. It works perfectly as a first leathercraft project.
Why Choose Leather and Brass Over Factory Straps
Mass-produced straps usually rely on synthetic webbing and cheap plastic hardware. Give them a year or two of heavy weekend shoots, and they crack, fray, or just look terrible. Building a custom leather strap with proper saddle stitching and solid brass hardware changes the equation completely.
- Longevity: Vegetable-tanned leather develops a rich, dark patina over time. It gets softer and molds perfectly to your neck with every single use.
- Strength: Saddle stitching uses two needles and one continuous thread. If you manage to snag and break a single stitch on a rogue tree branch, the rest of the seam stays securely locked. Machine lock-stitching simply cannot do that.
- Weight distribution: A heavy 70-200mm lens pulls hard. Thicker, well-conditioned leather spreads that focal weight across your shoulder far better than a thin strip of nylon webbing.
- Style: A hand-finished strap looks incredibly intentional. It feels like a professional tool rather than an afterthought tossed into a camera box at the factory.
Choosing the Right Leather
Grabbing the first piece of scrap hide you find online is a quick recipe for disaster. Not all leather belongs on a camera. You need specific weights and tanning methods to ensure the safety of your rig.
- Vegetable-tanned leather: Aim for a 4 to 5 oz thickness (about 1.6 to 2mm) for the main body. This thickness is firm enough to hold its shape but flexible enough to drape comfortably around your neck or shoulder.
- 8 to 9 oz leather: Reserve this heavy-duty stuff for the camera connection tabs. This is where the sheer dropping weight of your camera sits. Strength matters most right here.
- Full-grain leather: Skip top-grain or bonded leather completely. Full-grain includes the strongest, outermost layer of the hide. It ages properly and actively resists stretching out under a heavy load.
If you want to keep things simple, buy a single 6 to 8 oz shoulder belt blank from a local leather supplier. That single strip provides plenty of material for a 40 to 45 inch strap and two sturdy connecting tabs.
Tools You’ll Need
You do not need a massive workshop to pull this off. A small kitchen table works just fine.
- Rotary cutter or a sharp utility knife paired with a heavy steel ruler
- Edge beveler and a wooden burnisher (a scrap of heavy canvas works in a pinch)
- Diamond-shaped pricking irons (4 to 5mm spacing is the gold standard for camera straps)
- Two blunt harness needles and heavily waxed linen or polyester thread
- Rivet setter, a mini anvil, and a solid mallet (poly or rawhide, avoid metal hammers)
- Solid brass rivets (double-cap style, usually 7 to 9mm in length depending on your total leather thickness)
- Leather glue or basic rubber cement for a temporary bond before you start stitching
Step-by-Step Construction
1. Cut and Shape the Strap
First, cut your main strap to length. A standard shoulder strap runs between 42 and 48 inches long, with a width of 1 to 1.5 inches. Take a coin or a corner punch and round off the harsh square ends. This minor detail prevents the corners from curling up or snagging on your jacket zippers.
2. Bevel and Burnish the Edges
Freshly cut leather has sharp 90-degree corners. Run an edge beveler along both long edges to strip that sharp corner away. Next, wet the edges slightly with water and rub them briskly with your wooden slicker. The friction creates heat, melting the loose fibers together until the edge feels smooth and looks slightly glossy. Do not skip this. Burnished edges prevent the leather from chafing against your neck during a long day of shooting.
3. Mark and Punch Stitch Holes
Take your pricking irons and mark evenly spaced holes about 3 to 4mm in from the edge. Strike the irons straight down with your mallet. Perfectly consistent spacing is exactly what gives hand-sewn leather that premium, professional aesthetic.
4. Saddle Stitch the Connection Tabs
Now you need to attach the smaller leather tabs. These are the crucial pieces that will actually loop through your camera’s metal split rings or lugs. Secure them to the main strap using the traditional saddle stitch.
- Thread two needles on opposite ends of a single piece of waxed thread.
- Push the first needle through the first hole, pulling the thread until you have equal lengths on both sides.
- Push the second needle through that exact same hole from the opposite side.
- Pull both ends tight. Repeat this dance all the way down the row.
This two-needle method locks each stitch completely independent of the rest. Your gear stays safe even if the thread takes a beating over the years.
5. Set the Brass Rivets
Some areas demand extra reinforcement. Strap ends, D-ring loops, or quick-release tabs take a lot of physical stress. Punch a snug hole through both layers of leather. Push the brass rivet post through from the back, pop the cap on top, and strike it firmly with your setter and mallet against a hard anvil. Make absolutely sure you buy solid brass rivets rather than cheap split rivets. Solid brass offers the cleanest finish, boasts incredible sheer strength, and refuses to rust when you get caught out in the rain.
6. Condition the Leather
Wrap up the build with a light coat of a neutral leather conditioner or balm. Rub it in with a soft cloth using circular motions. This hydrates the hide, keeps it remarkably supple, and adds a nice layer of water resistance without darkening the color too drastically.
Common Mistakes to Avoid
- Using chrome-tanned leather: Garment leathers stretch far too much. They cannot hold stitch holes properly and will eventually sag under the weight of a heavy lens.
- Skipping the edge finishing: Raw, unburnished edges absorb sweat and fray into an ugly, fuzzy mess after a few weeks of regular use.
- Over-tightening rivets: Smashing a rivet too hard with your mallet will actually crush and crack the leather fibers around the hole. Snug and seated is plenty tight.
- Uneven stitch spacing: Take your time marking the punch holes. Crooked stitching is the most glaring, visible sign of a rushed job.
Conclusion
Making a hand-stitched camera strap turns a few raw materials into an heirloom piece of gear. It takes just one free weekend on the kitchen table to pull it off. Pick up some quality full-grain vegetable-tanned leather. Take the time to master the saddle stitch on a few scrap pieces first. Lock everything down with solid brass hardware at the heavy stress points. You will end up with a rugged, beautiful strap that gets softer and more comfortable with every photo walk. It might just outlast the camera you originally attached it to.